Category: Uncategorized

  • Easy Vanilla Flan

    why make this recipe

    Easy Vanilla Flan is a classic dessert that is loved by many for its smooth texture and sweet flavor. This recipe is perfect for both beginners and experienced cooks, making it a great choice for any occasion. Flan is often a hit at parties and gatherings, and its simple ingredients mean you can whip it up quickly. Plus, it’s a make-ahead dessert, so you can prepare it in advance and serve it when you’re ready!

    how to make Easy Vanilla Flan

    Ingredients:

    • 2 cups milk
    • 1 cup sugar
    • 4 large eggs
    • 2 teaspoons vanilla extract
    • 1/4 cup water

    Directions:

    1. Preheat the oven to 350°F (175°C).
    2. In a saucepan, combine sugar and water over medium heat until the sugar dissolves and turns a golden caramel. Quickly pour the caramel into a flan mold or individual ramekins.
    3. In a mixing bowl, whisk together the eggs, milk, sugar, and vanilla extract until well combined.
    4. Pour the egg mixture over the caramel in the mold or ramekins.
    5. Place the mold in a larger baking dish filled with hot water (this is called a water bath).
    6. Bake for about 45 minutes or until set.
    7. Let cool, then refrigerate for at least 4 hours before serving.
    8. To serve, invert the flan onto a plate and enjoy.

    how to serve Easy Vanilla Flan

    To serve Easy Vanilla Flan, simply invert it onto a plate so the caramel layer is on top. You can garnish it with fresh fruit, whipped cream, or a sprig of mint for a touch of color. Enjoy it chilled for the best flavor and texture.

    how to store Easy Vanilla Flan

    Store any leftover flan in the refrigerator. Cover it with plastic wrap or place it in an airtight container. It will stay fresh for up to 3 days. Avoid freezing the flan, as this can change its texture.

    tips to make Easy Vanilla Flan

    • Make sure to watch the sugar closely while making the caramel. It can burn quickly!
    • Use room temperature eggs for a smoother mixture.
    • If you find the flan is not set after baking time, give it a few more minutes in the oven. It should jiggle slightly in the center when done.
    • For extra flavor, try adding a pinch of salt to the egg mixture.

    variation (if any)

    You can experiment with flavors by adding ingredients like cocoa powder for chocolate flan or citrus zest for a refreshing twist. Coconut milk can also be used in place of regular milk for a tropical flavor.

    FAQs

    What is flan?
    Flan is a type of caramel custard dessert. It has a smooth and creamy texture with a sweet caramel sauce on top.

    Can I make flan ahead of time?
    Yes! Flan can be made a day or two in advance. Just make sure to store it in the fridge until you’re ready to serve.

    What if I don’t have a flan mold?
    No worries! You can use individual ramekins or any oven-safe dish. Just adjust the baking time if needed, as smaller servings may cook faster.
  • Baked Semolina Gratin

    why make this recipe

    Baked Semolina Gratin is a comforting dish that brings warmth and satisfaction to any table. It combines simple ingredients to create a creamy, cheesy delight with a crispy top. This dish is not only delicious but also incredibly versatile, making it a great addition to your meal rotation. It’s perfect as a side dish, a main course, or even a hearty snack.

    how to make Baked Semolina Gratin

    Ingredients:

    • Semolina
    • Milk
    • Eggs
    • Butter
    • Cheese (such as Gruyère or Parmesan)
    • Salt
    • Pepper
    • Nutmeg (optional)

    Directions:

    1. Preheat the oven to 180°C (350°F).
    2. In a saucepan, bring milk to a boil and stir in the semolina gradually. Cook until thickened.
    3. Remove from heat and mix in butter and cheese.
    4. Allow to cool slightly, then beat in eggs.
    5. Season with salt, pepper, and nutmeg.
    6. Pour the mixture into a greased baking dish.
    7. Bake for about 30-40 minutes, or until golden and set.
    8. Let cool slightly before serving.

    how to serve Baked Semolina Gratin

    Baked Semolina Gratin is best served warm. You can enjoy it as a side dish alongside meats or vegetables. It also works well as a standalone dish. To make it even more appealing, sprinkle some extra cheese on top before baking, or add some herbs for garnish.

    how to store Baked Semolina Gratin

    Leftovers can be stored in an airtight container in the refrigerator for up to three days. To reheat, simply warm it in the oven or microwave until heated through. You can also freeze it for longer storage, but be aware that the texture may change slightly once thawed and reheated.

    tips to make Baked Semolina Gratin

    • Use good quality cheese for the best flavor.
    • Try adding cooked vegetables like spinach or mushrooms to the mixture for added nutrients.
    • For a crunchy topping, sprinkle breadcrumbs mixed with a little butter on top before baking.

    variation

    You can switch up the cheese according to your preference. Using a blend of cheeses can enhance the flavor. Additionally, you can substitute semolina with other grains like quinoa or polenta for a different twist.

    FAQs

    1. Can I make this dish ahead of time?
    Yes, you can prepare the mixture a day in advance and store it in the refrigerator. Bake it just before serving.

    2. Is this recipe gluten-free?
    No, this recipe contains semolina, which is made from wheat. For a gluten-free version, consider using gluten-free grains or pasta.

    3. What can I serve with Baked Semolina Gratin?
    This dish pairs well with a simple salad, roasted vegetables, or grilled meats. It’s versatile enough to match with many different dishes.

  • Golden Onion Omelette

    why make this recipe

    Golden Onion Omelette is a simple yet delicious dish that brings out the sweet flavor of caramelized onions. It’s a great way to start your day, packed with protein from eggs and the added benefits of onions. This recipe is quick to make and can easily be modified to fit your taste. Plus, it’s perfect for breakfast, brunch, or even a light dinner!

    how to make Golden Onion Omelette

    Ingredients:

    • 3 eggs
    • 1 medium onion, finely sliced
    • 2 tablespoons butter
    • Salt to taste
    • Pepper to taste
    • Chopped parsley for garnish (optional)

    Directions:

    1. In a skillet, melt the butter over medium heat. Add the sliced onions and sauté until they are golden brown.
    2. In a bowl, whisk the eggs with salt and pepper.
    3. Pour the eggs over the caramelized onions in the skillet.
    4. Cook until the edges start to lift, then gently lift them with a spatula to allow uncooked egg to flow underneath.
    5. Once mostly set, fold the omelette in half and cook for another minute until fully cooked.
    6. Serve hot, garnished with chopped parsley if desired.

    how to serve Golden Onion Omelette

    Serve your Golden Onion Omelette hot from the skillet. It can be enjoyed on its own or with a slice of toast. If you like, you can add toppings such as cheese, tomatoes, or avocado to make it even more flavorful.

    how to store Golden Onion Omelette

    If you have any leftovers, let the omelette cool completely, then store it in an airtight container in the refrigerator. It should be eaten within 2 days for the best taste. You can reheat it in the microwave for a quick meal.

    tips to make Golden Onion Omelette

    • Make sure to cook the onions until they are nice and golden for the best flavor.
    • You can add other vegetables like bell peppers or spinach if you want more variety.
    • Use a non-stick skillet for easier flipping and cleaning.

    variation

    Feel free to add cheese like cheddar or feta for an extra creamy texture. Herbs like basil or thyme can also enhance the flavor. For a spicier version, add chopped jalapeños or red pepper flakes.

    FAQs

    Can I use eggs other than chicken eggs?
    Yes, you can use duck eggs or quail eggs, but cooking times may vary.

    Can I make this omelette ahead of time?
    Yes, you can prepare it in advance, but it’s best enjoyed fresh. If making ahead, reheat gently.

    How do I know when my omelette is done?
    The omelette is done when the edges are set and the center is slightly soft but not runny. Cooking it longer will make it firmer.

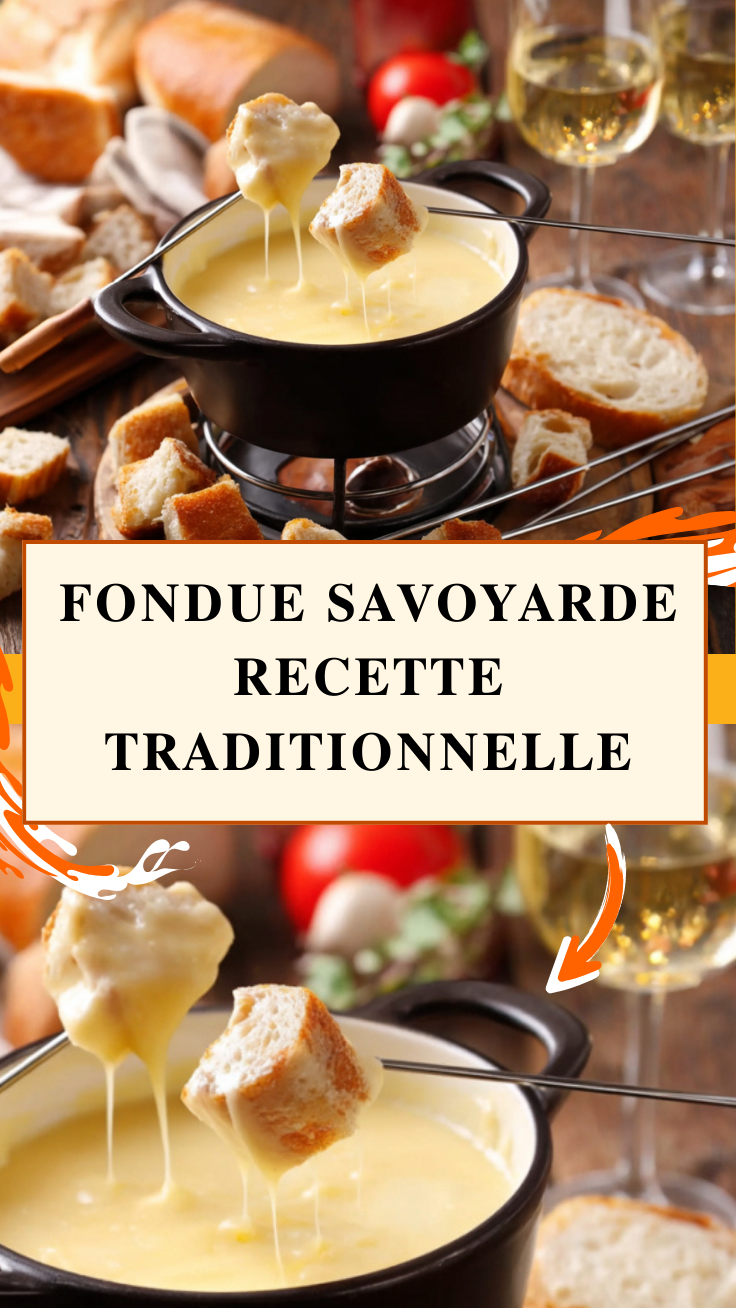
  • Fondue Savoyarde Recette Traditionnelle : La Magie du Fromage Fondu

    Fondue Savoyarde Recette Traditionnelle : La Magie du Fromage Fondu

    La fondue savoyarde est plus qu’un simple plat d’hiver. C’est une tradition conviviale, une célébration du fromage fondu, et un moment chaleureux à partager. Originaire des montagnes de Savoie, cette recette authentique se transmet de génération en génération. Voici comment réussir la fondue savoyarde chez vous, avec les bons fromages, les astuces de cuisson et l’équipement adapté.

    🧀 Les Ingrédients Essentiels pour une Fondue Savoyarde Réussie

    La fondue repose sur un mélange harmonieux de fromages savoyards et de vin blanc. Pour 4 personnes, voici ce qu’il vous faut :

    IngrédientQuantité
    Fromage Comté200 g
    Fromage Beaufort200 g
    Fromage Emmental200 g
    Vin blanc sec (de Savoie)25 cl
    Ail1 gousse
    Maïzena (optionnelle)1 c. à soupe
    Pain de campagne rassis1 grosse miche coupée en dés
    Poivre & muscadeUne pincée (facultatif)

    Astuce pratique : Choisissez un pain de la veille. Il est plus ferme et ne se désagrège pas dans le fromage chaud, ce qui évite qu’il ne tombe au fond du caquelon.

    🔪 Les Ustensiles Indispensables

    Pour une fondue savoyarde dans les règles de l’art, il vous faudra :

    • Un caquelon à fondue ou une cocotte en fonte
    • Un réchaud à fondue pour maintenir la température
    • Des fourchettes longues à fondue
    • Une spatule en bois

    👉 Pas de matériel spécifique ? Une petite casserole épaisse peut faire l’affaire. Attention toutefois à bien surveiller la température pour éviter que le fromage ne brûle.

    👩‍🍳 Étapes de Préparation de la Fondue Savoyarde

    1. Préparer les fromages

    Commencez par râper ou couper en petits cubes le Comté, le Beaufort et l’Emmental. Ce trio savoyard crée une texture fondante et un goût profond, typique de la fondue traditionnelle.

    2. Frotter le caquelon avec l’ail

    Coupez la gousse d’ail en deux, puis frottez l’intérieur du caquelon. Ce geste discret parfume subtilement la fondue et accentue son authenticité.

    3. Faire chauffer le vin blanc

    Versez le vin dans le caquelon. Chauffez-le à feu doux jusqu’à ce qu’il soit bien chaud, sans jamais le porter à ébullition. Cela permet de libérer les arômes sans évaporer l’alcool trop rapidement.

    4. Ajouter les fromages

    Ajoutez progressivement les fromages tout en remuant sans arrêt avec la spatule. Le fromage doit fondre doucement, en formant un mélange homogène et onctueux.

    5. Épaissir (optionnel)

    Si la fondue est trop liquide à votre goût, vous pouvez ajouter une cuillère à soupe de Maïzena diluée dans un peu de vin froid. Cela épaissit le mélange sans altérer le goût.

    6. Assaisonner

    Ajoutez une pincée de poivre et un soupçon de muscade pour relever le tout. C’est prêt à servir !

    🏔️ Une Recette aux Racines Montagnardes

    La fondue savoyarde trouve ses origines dans les Alpes françaises, plus précisément en Savoie. Elle naît de la volonté de ne pas gaspiller le fromage et le pain durci. En faisant fondre les restes de fromage avec du vin, les montagnards ont créé un plat à la fois économique et convivial, devenu aujourd’hui un symbole culinaire de la région.

    🍽️ Conseils de Dégustation

    Servez la fondue immédiatement après préparation. Placez le caquelon sur le réchaud au centre de la table. Chaque convive pique un morceau de pain avec sa fourchette et le plonge dans le fromage fondu. Attention à ne pas perdre son pain dans le caquelon — selon la tradition, celui qui le fait doit un gage !

    Suggestions d’accompagnement :

    • Une salade verte vinaigrée pour la fraîcheur
    • Des cornichons ou oignons au vinaigre
    • Un vin blanc de Savoie (Apremont, Roussette) pour rester dans le ton

    ❄️ Quand Déguster une Fondue Savoyarde ?

    La fondue savoyarde est idéale lors des longues soirées d’hiver, après une journée de ski ou pour une soirée entre amis. Elle évoque instantanément la chaleur des chalets et la convivialité des repas partagés au coin du feu.

  • Hello world!

    Welcome to WordPress. This is your first post. Edit or delete it, then start writing!